Easy Way to 3D Scan and Print with Photogrammetry
Some context: Photogrammetry is a term coined in 1867 by a Prussian architect (hence the difficult pronunciation). It is a science that uses photos to understand information about the object(s) present. A specific use case is to use multiple pictures in determining the geospatial relationship of the same object(s) across a series of photographs, then produce a 3D model from that understanding.
And here is where I come in:
I first heard about photogrammetry from this YouTube video by CG Geek. It seemed like it might be something I could do, so I decided to try it out! I recently acquired a Creality Ender 5 Pro that I wanted to try more fun stuff with. To take this to the next level, I bought a direct drive kit from Micro Swiss in order to use NinjaFlex but you can do this same concept with a stock 3D printer and other filament.
CG Geek’s video focused on scanning static objects in nature (and specifically a tree stump). I thought it might be difficult to scan a more dynamic object like my face but, in the end, it wasn’t much of an issue. I hope most people would agree that my face is more appealing than a dead tree stump too!
It took me about 30 minutes to take all the pictures with my mirrorless camera however, fancy camera like that is not needed for a high-quality 3D scan…a smartphone will do just fine. The key in this stage is ensuring that the camera is stable and the subject (in this case me) is the same distance and placement with respect to the camera. I used a tripod and marked an X on the floor to stand on. It would have been easier with a second person there to align the camera, so I was centered. Get creative if you don’t have those things though: a stack of books, a shelf, whatever works.
Make sure you take a lot of pictures! The more pictures you can take, the less work you will have to do when creating the STL model. I took the bare minimum: 30. This led to the initial model having a huge hole in the back of my head and very little neck. Both problems could have been solved with more pictures.
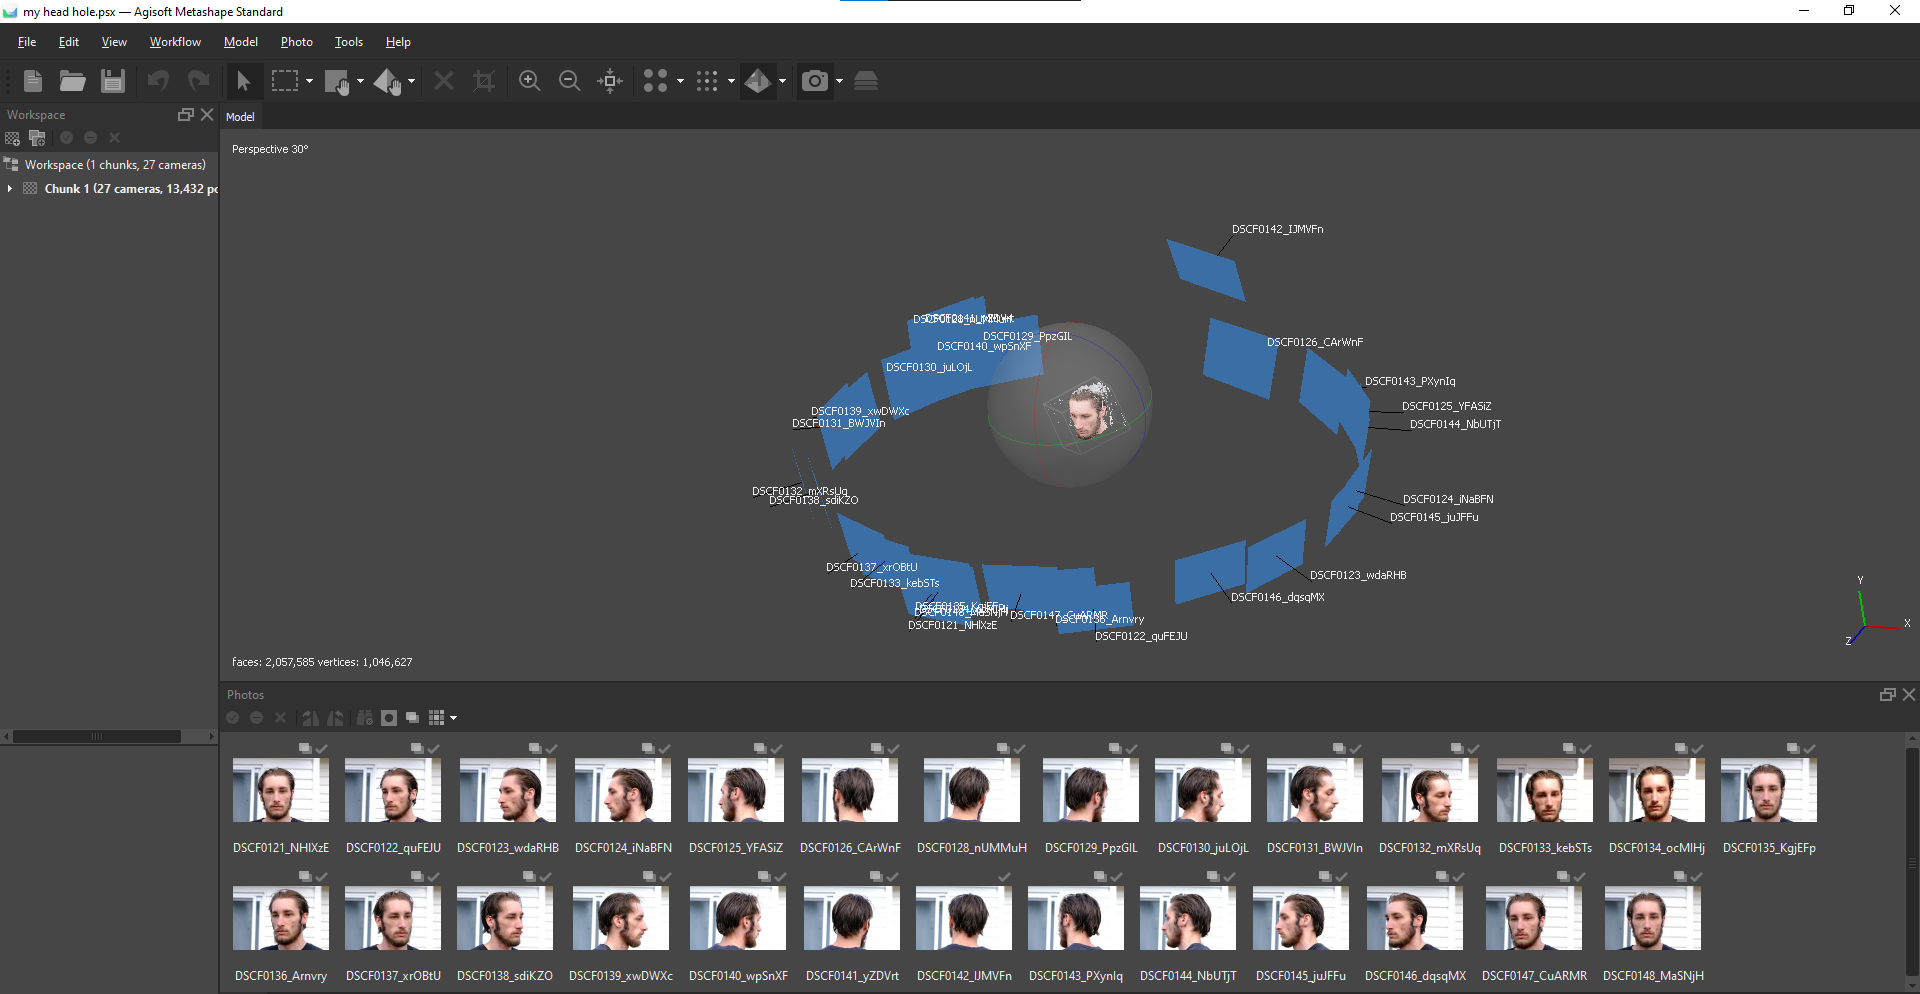
For photogrammetry software, there are several out there. My first try was with an open-source (free) program called Meshroom that utilizes AliceVision. I tried using this first as I have a strong preference towards open-source and this is supposed to be one of the best. It is also supposed to work with all types of graphics cards but I could not get it to work with my AMD chip. So I ended up using AGISoft Metashape. It is not free but it does have a free 30 day trial. They also work with some SaaS providers to provide monthly plans if you don’t want to shell out $179 upfront for a license.

It did take me most of an evening of focused work to get an STL model that looked good enough to print. I am still relatively novice when it comes to 3D modeling and I learned a lot. It would take me far less time to do it over again. The majority of the time required was spent cleaning up surfaces of my skin that were supposed to be smooth by using the sculpting tools in Blender. In a model that doesn’t require as much accurate detail like a face does, I imagine the editing would be minimal. Just need to take a lot of pictures!
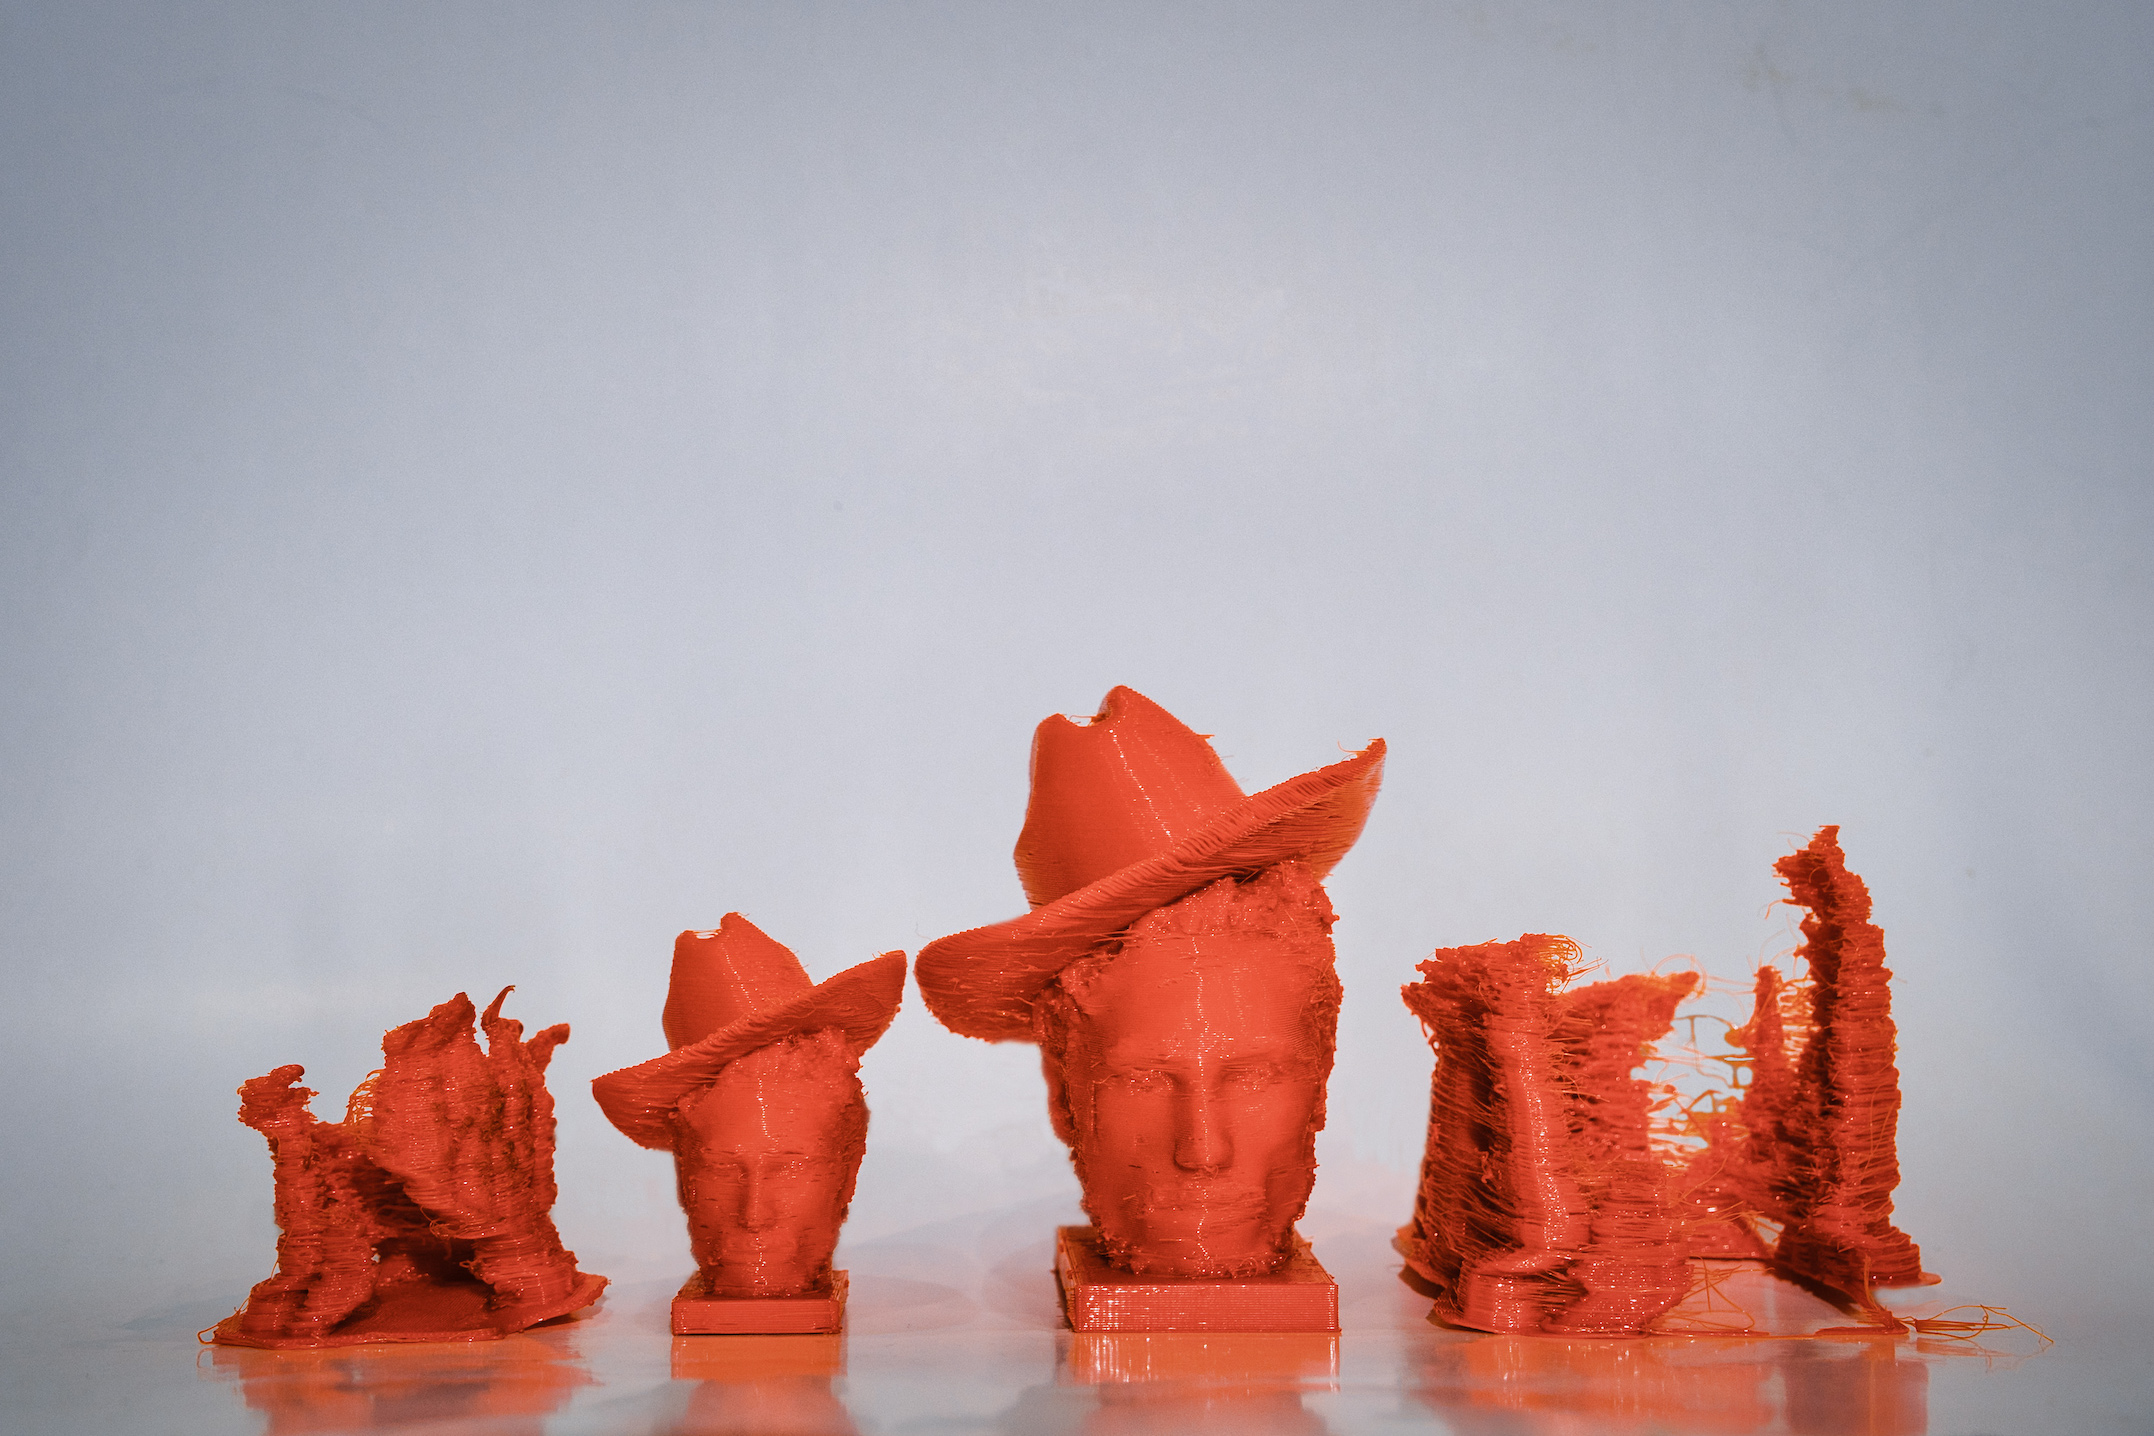
The rest of the process was fairly similar to any other 3D print. There were some settings in Cura that helped me fill some of the holes so don’t feel like you have to fill them before slicing.
I printed a couple of different sizes of my head. They are pretty neat since they are a bit squishy with NinjaFlex. You can see I wasn’t shy in adding supports!
My main lessons learned: try to have a second person take pictures, take A LOT of pictures, and make sure the camera is very still. I definitely plan on trying more of these prints. Now that I know what is possible, my 3D printing world has expanded almost infinitely.