Remote G-Code upload and printing - a tutorial

Remote G-Code upload and printing is available now. It was a little later than we promised. But we launched other features such as print job notifications (email, Telegram, and PushBullet) a lot earlier than scheduled. Guess we can give ourself a B+ on our score card? 😉
This is a short and easy-to-consume tutorial on how you can use this feature. Please give us feedback by commenting at the bottom.
Uploading a G-code file to print
Head to The Spaghetti Detective starting page and click the G-code tab. It’ll look like this
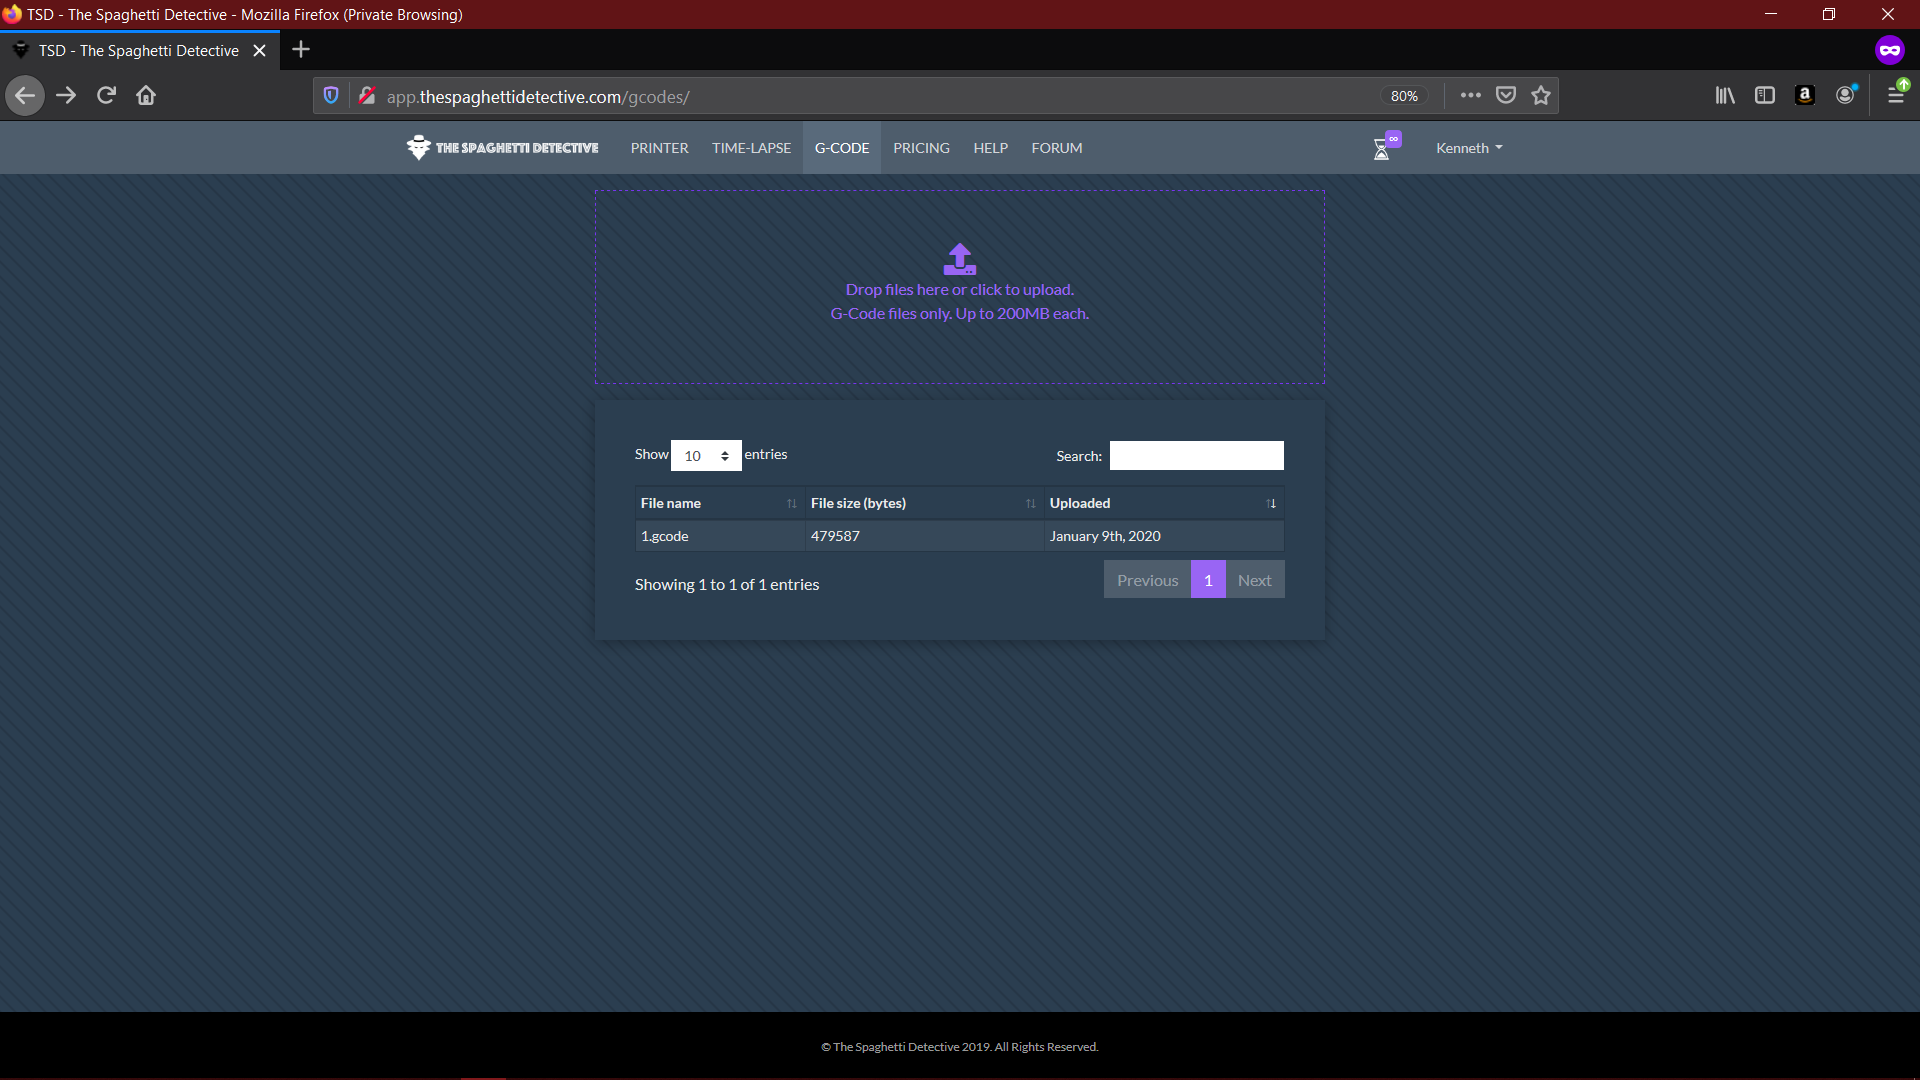
Now click on the box saying “drop files here or click to upload” (note the 200 mb limitation). It’ll open your file explorer and you can select the desired G-code.

Alternatively drag and drop a G-code file from a file explorer to here.
Either ways it should result in a screen like this.

Starting a print
Click "Printer" tab to view the printer page.
Scroll down to the appropriate printer. We’ll just use Cloud OctoPrint to demonstrate.
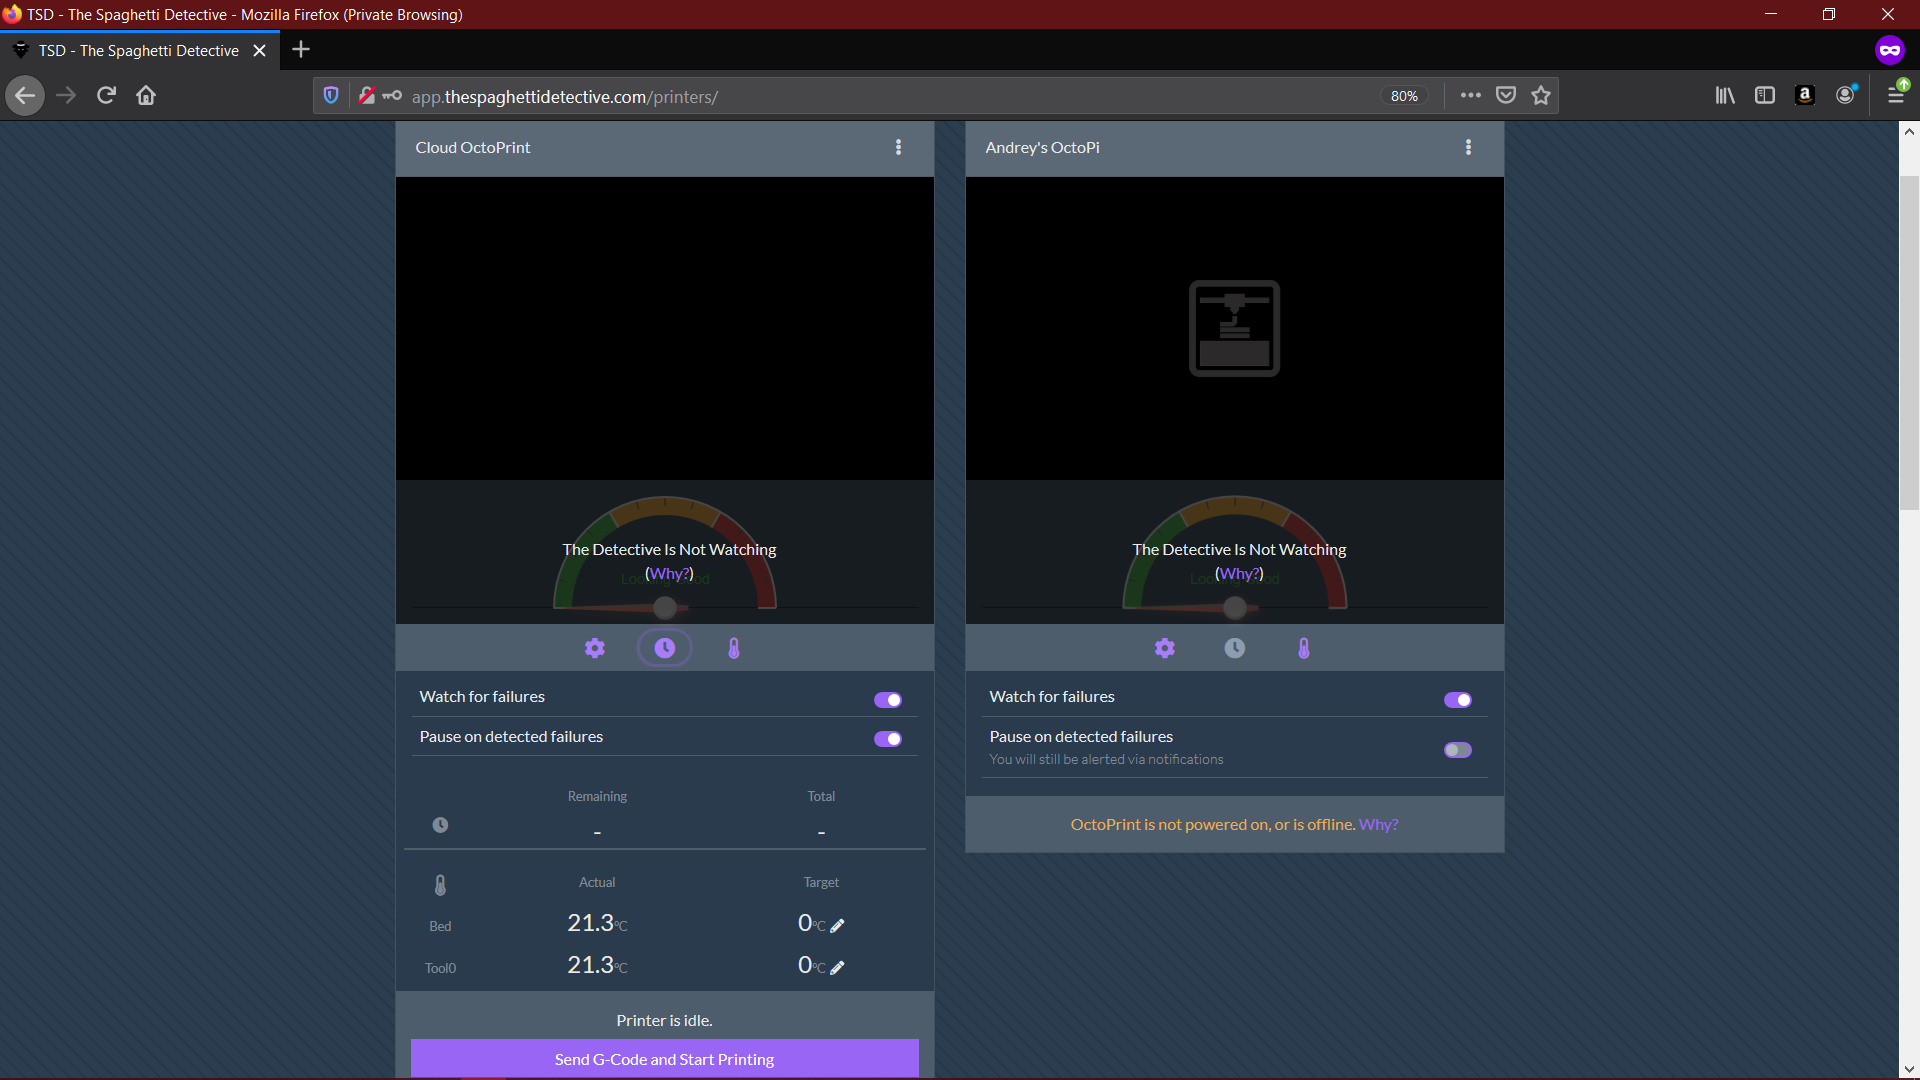
Click on the button “Send G-Code and Start Printing”. A pop-up will appear.

If you did upload a G-code already you could just click “print” and it’ll start the print immediately.

If you haven’t uploaded a G-code, click on the “upload more G-code” button. Which takes you to the first part.
TADAA you did it!
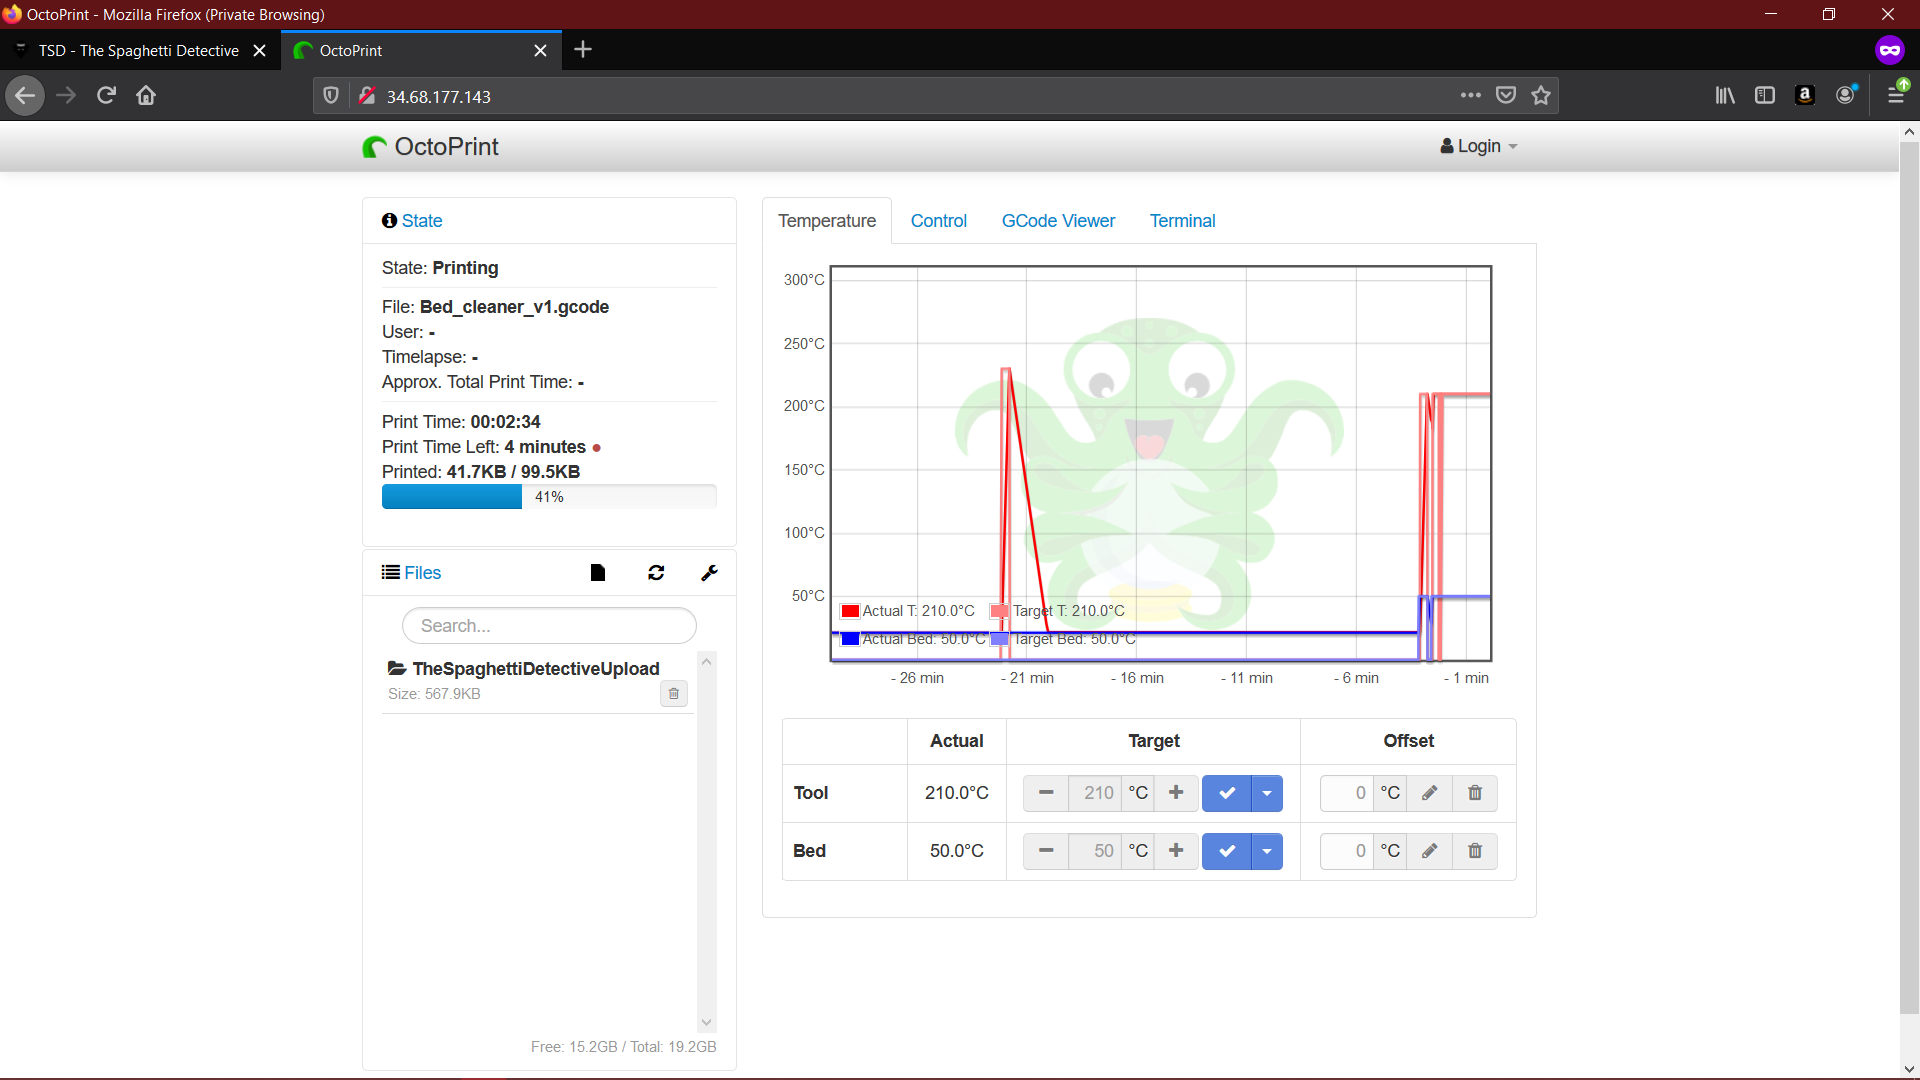
The OctoPrint side of this.
This is the print we started on our website.
Note the new folder "TheSpaghettiDetectiveUpload" on the left. This is where everything will be uploaded to.
You can start a print from there on OctoPrint itself too